WordPress Pay Button
IntaSend Pay Button option for a Basic WordPress Site
Introduction to IntaSend WordPress plugin
In this guide, you'll learn how to install, activate, and use the IntaSend payment buttons on your WordPress site. We have created a step-by-step guide and a video to help you get started.
1. Download IntaSend plugin for WordPress
Click the following link to download the latest plugin - https://wordpress.org/plugins/intasend-pay-button/
2. Install and activate the plugin
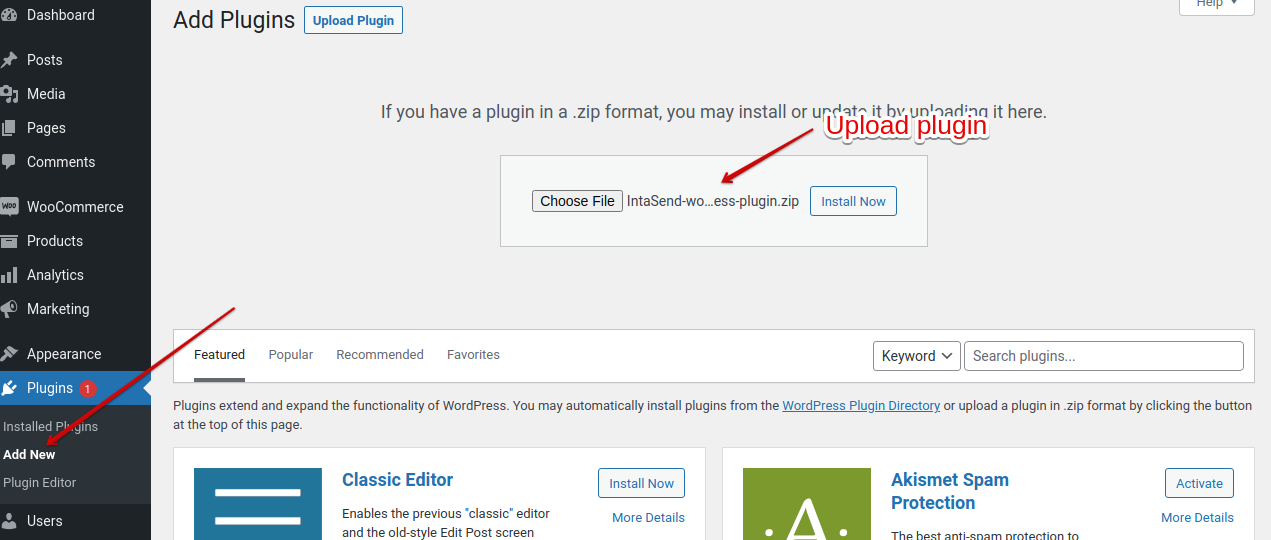
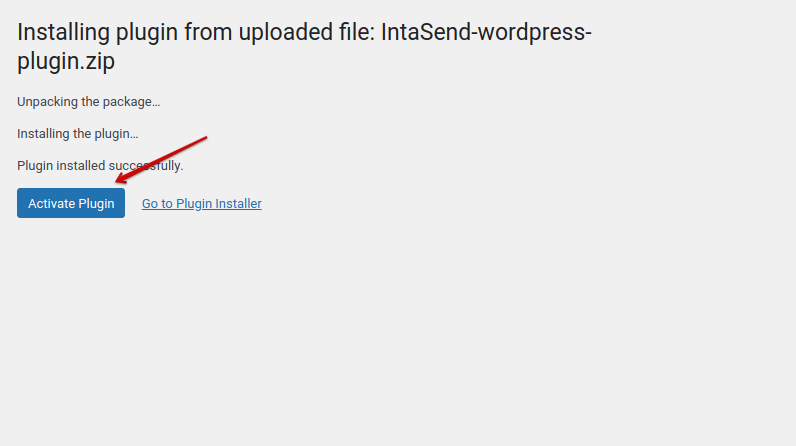
Make sure the plugin is activated and you can see it under the installed plugins list.
3. Configure IntaSend
Locate the IntaSend Payment panel on your dashboard (sidebar section).

4. Add your API Key
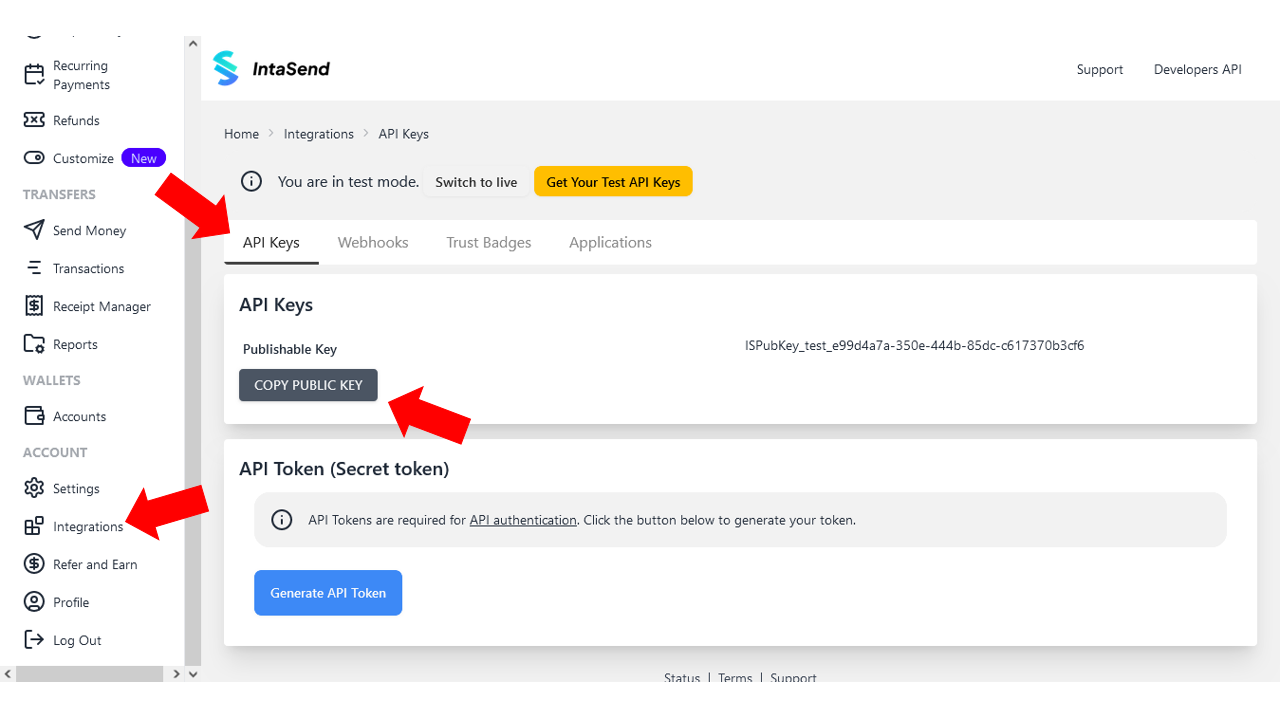
Get API Key from your IntaSend dashboard under setting panels
Add the obtained key to your website i.e under the IntaSend API Settings
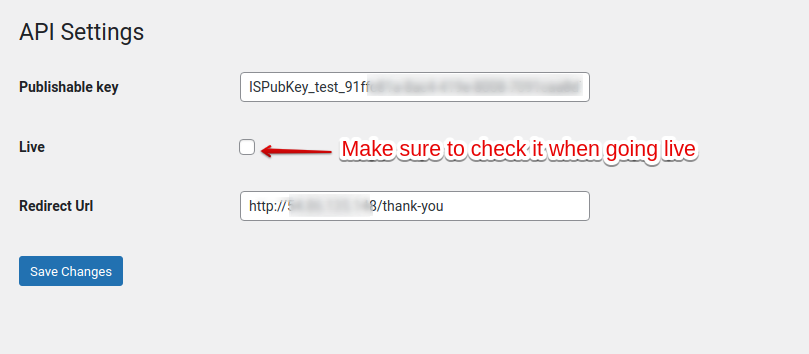
Use the redirect URL to specify the page where you would like your customers to be sent on payment success.
5. Add your button
Setup up your button by specifying the charge amount, currency, and payments tariffs.
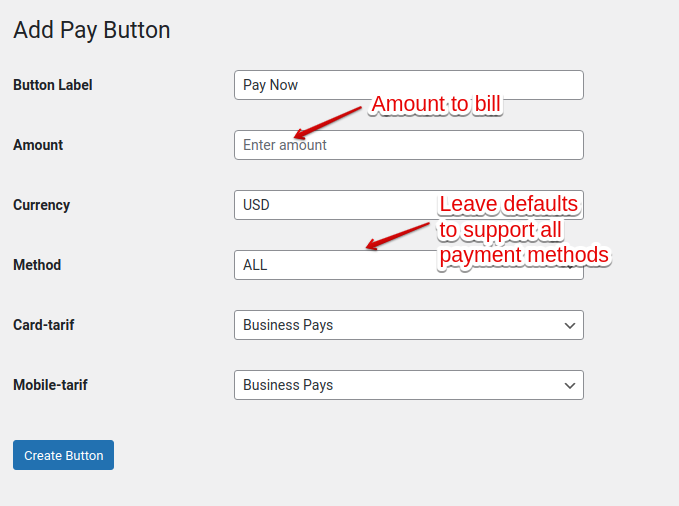
Click "Create Button" to create your new button.
6. Get your button short-code and add it to your post
Your new button will be added under the Payment Buttons list as shown below. You'll need the shortcode for use in your post.
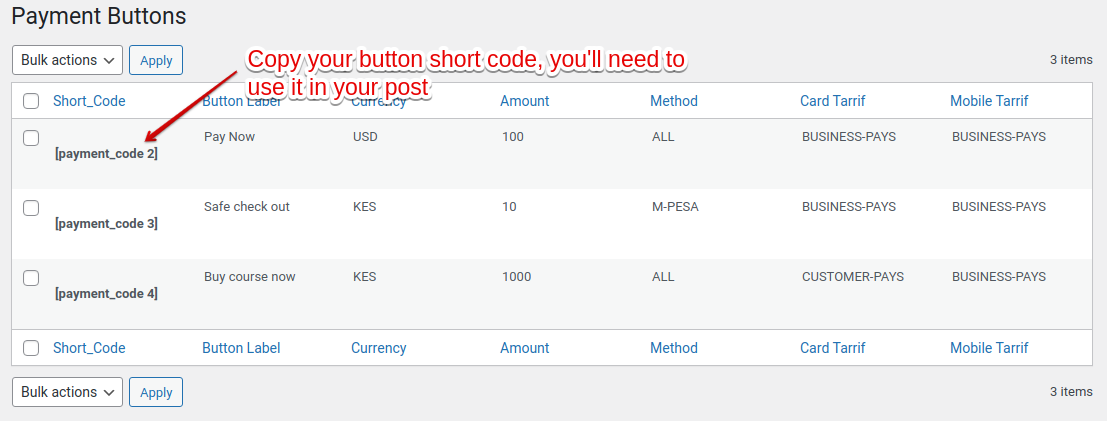
List of available payment button short codes
Create a new shortcode block in your post/page and copy the newly created button shortcode, and add it to your post i.e where you would like to position your payment button.
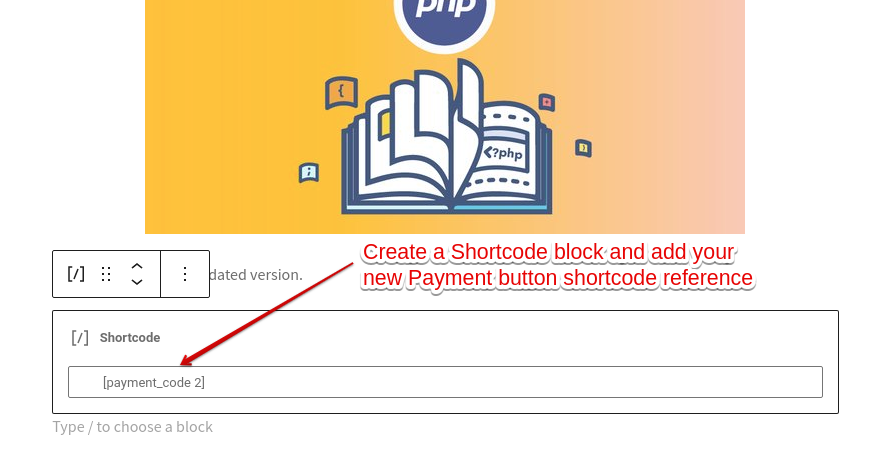
A sample post with shortcode block for payment button
Save changes and publish the page. Congratulations, you are now ready to start receiving payments.
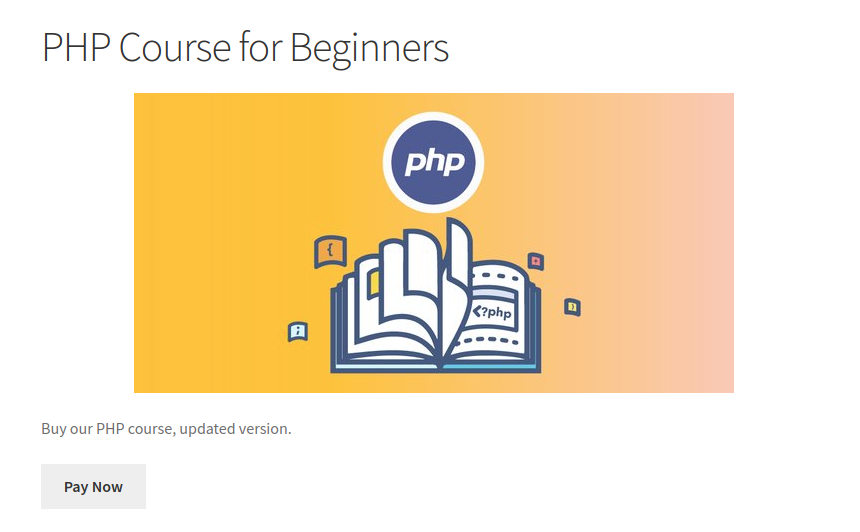
A sample page with IntaSend enabled payment button
Congratulation - You have now successful Installed IntaSend on your website and you are now ready to start accepting online payments.
Updated over 1 year ago
